Showing posts with label Tethon3D. Show all posts

Tuesday, June 25, 2019

ComeTrue T10/M10 Due Diligence: Comparison Documentation

I was going to move on to powder handling for my second "Due Diligence"; but, I got waylaid by my growing appreciation for the documentation available to us that provides a wealth of information as we do our research into the T10 and/or M10.

A good place to start is with a document I was late to find.  And, that is a PDF that compares the T10 and M10 side-by-side.
190125 Full-Color+Ceranic_EN-A4.pdf
Yes, you will find some spelling errors and typos in ComeTrue3D's English language documentation and web pages.  But, don't let that fool you.  There is a wealth of information that transcends ANY such minor flaws.  Here are some things I learned from this one document.

Lines 1 through 4

Let's begin with the first four lines of the comparison table:

    Model T10 T10 M10
    Application Full-Color Ceramic Ceramic
    Build Size 200x160x150(mm) 200x160x150(mm)    200x160x150(mm)
    Max part size    190x150x140(mm)    100x100x60(mm) 100x100x60(mm)


We glean three interesting facts from these first four lines...
1. The T10 CAN Print in both Gypsum and Ceramic

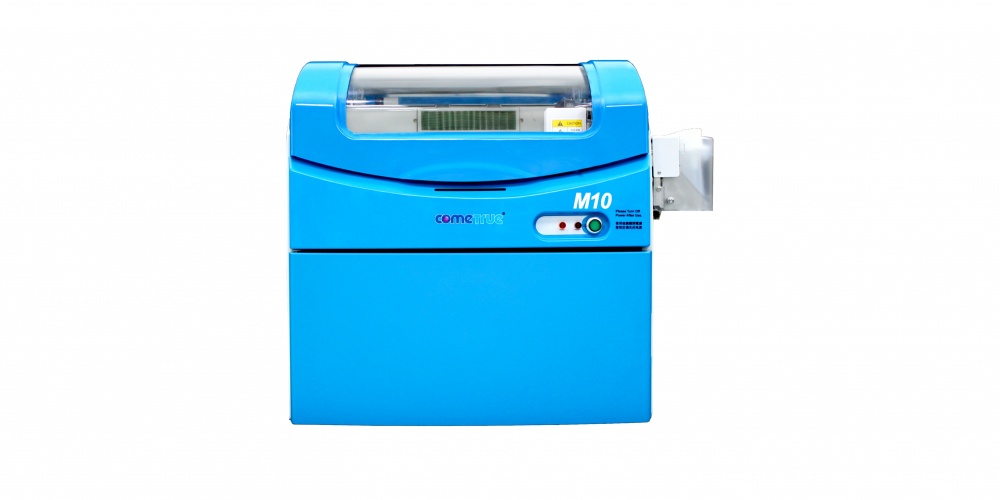
The M10 is a less expensive version of the ComeTrue3D powder/binder printer that eliminates the full color capabilities to save money. But, it is not the only version that can handle ceramic powder. This is clear from the very first lines of the comparison sheet.

2. Color is Not Available with Ceramic Powder

Notice that the application doesn't split the two capabilities between Gypsum and Ceramic. It differentiates between Full-Color and Ceramic. I am trying to find out why. The aborted 3D Systems CeraJet ceramic printer could print in color using ceramic powder. So, I'm wondering if this might have something to do with 3D Systems patents, which would be aggressively defended.

Or, it could be an ink formulation issue where the current inks simply can't stand up to the heat. While it's an interesting question it is not a huge deal to us since NONE of the new ceramic printers can print in full color.

3. Build Size the Same but Part Size Differs by Application

Interestingly, when printing in ceramic powder, the allowable part size is reduced considerably. Nothing in the documents I've reviewed so far indicate the reason for this. It's certainly a factor in making a decision. True, it is very easy to use glaze to bond multiple parts during firing. But, even so it's hard to give the ComeTrue3D printers a 10 out of 10 when it comes to allowable part size when printing with ceramic powder.
Lines 5 through 10
In lines 5 through 10 of the comparison sheet we learn the following:

1. Type is "Desktop"

All of the models are classed as "Desktop" and are the same physical size.

2. Print Speed is 20mm per Hour

The great thing about powder/binder printers is that height is time. Unlike FDM printers, the difference in time between printing one item or 15 items is negligible. With a print speed of 20mm per hour, if the maximum Z-Axis is 60mm, then the longest print job would be about 3 hours plus the time to initialize a print job.

3. Layer Thickness Defaults 0.08mm, but, is Variable

Z-Axis Layer thickness is as little as 0.08mm. However, the listing for the M10 includes special modes specifically designed for developers wishing to use experimental powders. However, based on my earlier conversation with actual users, I'm thinking that this capability extends to the T10 as well. This would be a good question to ask your sales rep if you plan to use either of these printers in an experimental lab.
Lines 11 through 14

1. The M10 Permits "Print Time" and "Nozzle Slot" Selection for Developers.

Actually, this is talking about the number of times the printer applies binder for each layer. This is specifically provided to address the fact that "green" ceramic prints are more delicate than full color gypsum prints. ALL of the colors in the T10 are listed as "BINDERS". So, one can assume that full-color prints are sprayed with a bit more total binder in each pass than is a ceramic print. My understanding is that, being able to tell the printer to make multiple binder passes for each layer ensures that more binder is delivered and, theoretically, the 'green' part is a bit more robust.

The slot number selection may have to do with using experimental binders.

2. Horizontal Resolution is 1200 x 556 dpi

This is true of both the T10 and the M10 and is the same for both full color and ceramic. This is excellent resolution. But, remember, the true smoothness of a part surface is going to be determined by the powder used. Parts printed in fine powder will be able to benefit by this resolution better than those printed with a coarse powder.

3. The T10 uses TWO Print Heads and the M10 only uses ONE.

Both print heads on the T10 share the duties of dispensing color and binder. Since, the M10 is not a color printer, there is no need for a second head. Each head has 2400 nozzles for a total of 4800 nozzles on the T10. The print heads are MUCH larger than those on our ZCorp 450 or 310.

Lines 15 through 20
Most of the information in lines 15 through 20 demonstrate that the two different models are essentially the same in most categories of specifications. In summary both the T10 and M10: 
  • Use the ComeTrue Print client software
  • Connect via USB 2.0
  • Are Certified for CE, FCC/IC
  • Operate in Windows 7 / Vista / 8 and 10
  • Operate at 100-210 or 200-240 volts
But, there is one significant difference in comparison line item 16.

The T10 Relies on .WRL Files for Printing Color

Both the T10 and the M10 can print from STL files. But, for color printing the only file type that it appears the comeTrue Print client can send to the T10 is the .WRL file type. Other common color file types like .OBJ, .PLY or .3DS must be converted to .WRL for printing.

This is not uncommon. The ZCorp Z450 requires "Vert color" .PLY or .WRL file types. But, it may be a new limitation to those not familiar with color printing. ComeTrue 3D has private labeled the "Pro" version of Netfabb as PixiRite Preparation Software. I understand that the cost is $1,500.

Since it is based on the NetFabb engine, it promises to be an excellent 3D file correction and converter software. While there is a "free" version of Netfabb available, it doesn't even come close to the power delivered by PixiRite.

Particularly if you are planning to capture 3D images for printing, I would urge you to seriously consider including PixiRite Preparation Software with your purchase.

We currently use Meshlab to make this type of file conversion. While free, it requires some complex workflow and we have not been entirely pleased with the conversions from .OBJ meshes to Vert color .WRL. Based on the little I've explore PixiRite, the whole conversion process looks cleaner and better. But, it is not something that I have been able to verify as yet.
Line 21
The final comparison in this document lists the consumables used by the T10 and the M10 in both full-color and ceramic print configurations.
Here is where it gets confusing...

Confusion #1 - Color Binders Under T10 Ceramic Column

I am not sure if this is simply an oversight or whether it's a hint that we can, in fact, use the color binders with ceramic. I have a call into the rep to clarify this.

Confusion #2 - Post Process Materials Included

In both the T10 and M10 ceramic columns, there are a number of materials that are NOT directly used with the printer itself. They are used only in the post-processing phase after printing is complete They are: 
  • TP-81 (Ceramic Patch Powders) 200g)
  • TG-82N (Clear Glaze Powders) 500g
  • TG-82W (White Glaze Powders) 500g
All of these are powders that are mixed with water. TP-81 is used to fill cracks and holes that can happen when moving the part from the printer to the powder recovery booth. TG-82N and TG82W are powders meant to be mixed with water and applied as glazes in the final firing, if desired.

What is unclear at this point is the role of using a thin "slip" for the second firing cycle that permeates the part as is common with other ceramic powder workflows.
One thing is clear as I continue on my "Due Diligence" journey attempting to learn all I can about the ComeTrue3D series of powder/binder printers. Having had previous experience with ZCorp powder/binder printers helps me appreciate the thoughtfulness of MicroJet Technology's engineers as they designed these two printers. While there is still a lot to discover before choosing a printer for our future needs, it is clear that the quality of the candidate products is MUCH higher than I first suspected.


Tuesday, June 18, 2019

Ceramic Printers - Powder/Binder: Expanding Our Options


I have had the privilege of being able to experience many forms of 3D printing, from very low cost consumer FDM 3D printers to professional Multi-Jet 3D printers costing nearly a hundred thousand dollars.  But, my favorite 3D printer type has always been powder/binder printing.

Perhaps first and foremost, you don't have to deal with vexing supports marring complex and beautiful finished parts. The powder is, itself, the support system and it is easily blown off the part at the end of the print.  But, another reason is that it is a surprisingly clean and safe method of printing.  In my mind it is MUCH safer and, ultimately, cleaner than liquid resin SLA.

Ceramic 3D printing, could be within reach of designers and artists, has been around for a while in the form of extrusion printers using a form of semi-liquefied clay.  May clay artists have found this method of printing to work well for them.  Extrusion clay printing has definitely been of value to others; But, it's never had an attraction for me.  Maybe I know that I'm just too lazy to clean up the mess after the print is done.

Earlier posts have talked about my experience with ceramic resin using a Formlabs Form2.  While we seem to be making progress with reliability, and it definitely has a place for small, intricate items like making ceramic jewelry.  It still is NOT a method I would want to count on to build a 3D ceramic printing business due to the print times. It is not particularly well-suited for scalability.

I'm just going to say it.  My bias is toward powder/binder, which is remarkable since I personally have not printed a single ceramic item on a powder/binder 3D printer.  The problem up to this point is that unless one was willing to spend several hundred dollars there were no powder/binder printers dedicated specifically for ceramic powders.  One had to modify a gypsum powder/binder printer and find a 3rd party to supply an appropriate ceramic powder and accompanying binder.

Ceramic Powder/Binder Printing to this Point in Time

Tethon (Tethon3D.com) is one such company.  They provide several clay based powders to those who wanted to convert older ZCorp 310 printers to create ceramic 3D objects.  At YouthQuest Foundation, we were just given a surplussed  ZCorp Z310 Plus by the Fairfax County School System.

ZCorp Z310 Plus Powder/Binder Printer
Like our ZCorp Z450 printer, the 310 is designed to use a gypsum powder.  But, unlike the Z450, it is monochrome.  And, more importantly it does not rely on a cartridge binder supply system.  Binder is poured into a container on the right side of the machine, allowing for the use of 3rd party binders.  And, because the 310 is no longer supported by any manufacturer there is no risk of voiding a warranty because this is none.  When we obtained it, there was no print cartridge installed.  So, we have no idea if or when we might be able to get it up and running.  But, if and when we do, we will test one or more of the ceramic powders available from Tethon3D.

The down side, even if it does work well, is that it uses an HP 10 printer cartridge and, while they are still available on eBay, they have not been manufactured since 2016!  So, it is NOT a printer upon which we can rely too far into future.  Sooner or later even if one could find an HP 10 cartridge, the chances of it working would be slim to none.  But, for now, it is our best hope to begin our journey into printing in ceramics at the lowest possible cost and risk.

New Options:  Kwambio & ComeTrue 

A week or go, I would have written that there were only two new options for printing ceramics in 3D that was anything close to being a reality.  And, those options came from the same company, Kwambio.  The Ceramo Zero Max, at around $5,000, is the low-cost option and the Ceramo Two, at around $40,000, is the professional option.  (Prices might vary when actually released)   But, now I know that there are two viable companies making viable ceramic powder/binder printers.  Let's first examine Kwambio.

Kwambio - Ceramo Zero Max, Ceramo Two

The primary printer I've been following for the past few months is by Kwambio.


We also have a sample part printed on a Kwambio ceramic printer.


It has a wonderful feel and finish.  So, we know that it can produce beautiful ceramic prints.  I wish I could tell you more; but, as far as I know, there is not a single Kwambio printer in the field as it has yet to ship.  Do I believe it's real?  Yes.  But, until I visit the Kwambio offices in Hartford, CN, I am completely relying on the part I have in hand and the great communications I've had with Kwambio's sales and marketing teams.

Microjet- ComeTrue

For over a year, I have been following reports that two new powder/binder printers were reportedly being readied for market by Asian companies.  One was by SkyTech and was called the 3DPandoras.  So, far the 3DPandoras is what we used to call in the video game field, "Smoke & Mirrors".  From what I can tell, so far, all they have managed to achieve is to make their kickstarter customers demand their money back.  While that could change in the future, I'm not counting on the 3DPandoras any time soon.

Until a week or so ago, I would have told you that the ComeTrue ceramic printer was ALSO  most likely smoke & mirrors.  But, while reading about Tethon3D powders, I stumbled upon a reference that their powders also work in the ComeTrue M10 3D printer.  Hmmm... how could they know unless there was an actual ComeTrue printer with which to test it.  So, I made a concerted effort to see if, in fact, the ComeTrue printers had started shipping into the USA.

It took some effort; but, that effort paid off when I was actually able to talk with the North American distributer and quickly got some references for actual users.  
*Appearance for reference only and may vary.
ComeTrue M10 3D Powder/Binder Ceramic Printer


It should be noted that the users with which I've talked have the full-color A10 version.  But, the reviews I'm getting so far, are largely positive and realistic.  If they reported that a new powder/binder printer was absolute perfection, I would have dismissed them immediately.  After all, we've lived with the Z450 for more than 5 years and pay a hefty price for support just to keep it running!  But, what I have heard is that while there have been minor issues, the response by the support teams in both North America and abroad have been swift and helpful.  That is wonderful news.

The ComeTrue M10 is their ceramic specific printer.  I understand that the delivered price, with training and installation, comes in at around $20,000.  So, it falls between the two Kwambio offerings in price.  However, I have NOT seen a sample part.  But, here is a video that might be helpful.


If and/or when I get my hands on an actual sample I will let you know.

NOT EITHER/OR

For our application to be successful, we need to be able to print at production levels.  And, the most important factor is mitigating down time.  All 3D printers fail.  And, that is a given for a powder/binder printer.  The issue is not a failure; but, how well you can avoid having that failure disrupt your business catastrophically. And, that probably means building in redundancy.

For an individual artist already creating ceramic works of art manually, a single $5,000 Kwambio Ceramo Zero Max is AUGMENTING your income.  So, being down for a day or even a week isn't catastrophic.  But, for others, sharing the down-time risk over 3 lower cost printers might be a better strategy than purchasing a single high cost printer.

If we are successful in the endeavor we have planned, which will provide employment and training for at-risk students on the autism-spectrum, our ultimate strategy might be to have several $5000 printers, a $20,000 printer and a $40,000 high-volume professional printer in order to provide the highest levels of performance and quality while mitigating the affects of temporary failure by sharing the load over several print platforms.

The point is that having multiple choices is terrific.  As I learn more about each of these options I will be quick to share them with you.

Tuesday, May 28, 2019

Formlabs Ceramic Printing Progress

With each print job, new things come to light that help us learn what it takes to reliably print with the experimental ceramic resin on the Formlabs Form 2.

With the first successful print completed, with just one earring.  It was time to complete the pair and add a second pair to see how more than one earring printed.  So, the second print job included three earrings.  All of them were oriented as was the first.

Fortunately, the print was successful.  So, at this point I have been able to print 2 pairs of sample earrings.  This was encouraging!

FormLabs Ceramic Progress... four sets completed.

But, it was more than that.  It gave me multiple items to study closely.

The first thing that became clear is that while it is doable, removing all these supports cleanly is going to take time and time is money.  I had to find a way to print the items upright, or as near to upright as possible so that areas impacted by supports are minimized, while still providing the adherence required for successful printing.

One key, of course, is robust support creation.  But, the other key, was not so obvious.  But, it had been in front of me every time I had been successful up to the point of finishing a raft.  That key is preventing "cupping".  Think of "cupping" by visualizing the tentacles on an octopus or squid.  Our designs can form the suction cup features that make it difficult to separate a newly printed layer from the bottom of the resin vat.  In fact, the suction can be so great that it breaks supports completely causing catastrophic failure.

As I studied the successful prints carefully, something caught my eye.  What you cannot see in this image is that there are little holes around the circumference of the rafts generated by the Formlabs software.  They are SO tiny that it is even difficult to see them when you look closely while holding one in your hand.  Yet, they are important clues.  They are relief holes that allow air to escape which prevents cupping from happening at a level that causes the parts to fail.

I had been warned about "Cups" by the Formlabs software in previous prints.  But, now that message took on new meaning and I decided to investigate more deeply.  Before attempting to print again, I realized I had to create those same little escape holes in my entire part.

I have done so and now have just begun a new print job with four earrings.  Each earring design includes internal venting tunnels.  We'll see how it goes.  We'll have to wait some hours to find out.  But, I can tell you this, I am encouraged enough to purchase a new cartridge of ceramic material so that I can continue testing.  There IS light at the end of the tunnel.

UPDATE 1:  Support removal is unique for Ceramic Prints

I will write more about this topic in the near future.  We've been dealing with supports for years with a wide variety of techniques.  Using SLA plastic support removal tools and techniques is NOT going to have the same outcome with ceramic prints. Ceramic prints in their "green" state crumble easily.  So, using snips without damaging a part is more difficult than when removing plastic supports.  We're thinking that something like a rotary tool with a Dremel 561 Multipurpose Cutting Bit might be effective.  We'll see.  More later...

Dremel 561 Cutting Bit


UPDATE 2:  "Tunnel" method works! 

"Tunnel" Test Print
This was a quick snapshot taken with my camera just as the print completed.  Raft and supports were part of the design.  Raft is a hex design so that multiple groups can be easily placed into the print area.

But, I will have to delay getting better pictures for a bit due to our full teaching schedule through Saturday.  This is 3D ThinkLink Immersion Lab week for 6 cadets from Maryland, DC and South Carolina.  Keeping 6 cadets busy designing and printing on single color FDM, Color Mixing FDM, powder/binder full color and SLA takes full concentration.  Besides, it is a LOT of fun!

BTW, the print that finished this afternoon just about emptied my first ceramic cartridge; but, more is on the way.

Even though it might not arrive this week, we'll let the cadets design something for ceramic to be printed and fired before their graduation ceremony where we can present it to them.  In the meantime, we do have "tough" resin so they can see the result of their design from an SLA printer. They will be the first group to be introduced to both powder/binder and SLA during their 3D immersion experience.

Friday, May 24, 2019

Where There Has Been No Learning, There Has Been No Teaching

I went to college at a very small school, with just 35 in our graduating class.  But, in that tiny educational institution were some outstanding educators that cared deeply.  One of them was Dr. Wesley Willis.  The title of this blog entry is a quote from him that came to be the foundation stone of my own educational theory.  And, that is true even when the teacher and student are one and the same person.

Before I can teach the at-risk young people we are dedicated to serve, I must first teach myself.  And, sometimes I am a VERY slow student.  But, the teacher me cannot use that as an excuse to give up.  If teaching the student me is to be successful, the teacher me has to continue to try from every possible direction.

And, I am happy to say we have made progress.  We have our first successful ceramic print from the Form 2 SLA printer!


It's not an impressive part, by any means.  But, it represents some learning and that is a huge step.

For one thing, it tells us that we are correct in our feeling that even though we might choose to print larger ceramic objects using a powder/binder printer, if we can solve our issue with SLA and come up with a more reliable workflow that the end result will be stunningly detailed.  It's not an issue of "EITHER/OR" it's "AND".

We have to remember that the Form 2 was designed well before anyone decided to try ceramic materials to use with it.  It was never designed specifically for printing ceramics.  In fact, Formlabs is VERY clear that it is an experimental material that is not for the faint of heart to try to use.  But, ceramics has such unique character and value that it is worth the effort for those desiring those characteristics.

Where we are now

We have learned enough to print a single small item.  We have learned that when we do have a failure, it is imperative that we search through the dense, opaque material for every vestige of failed print that might be the cause of the next print to fail.  And, we have also learned that being successful with printing a single item does not mean you will be successful with printing multiple items in a single print job.  This is the result of getting greedy!


Not good.  This is a capture from the camera we use to monitor prints when we are not there.  Clearly one or more parts fell off.  But, until I get into the office, we don't know more than that.

When we analyze the failures, it appears that the suction that is inherent in all SLA printers that print upside down is a major part of the problem.  The new Form 3 series of printers is designed to reduce that effect so that may be a better option. We just don't know.

Another option is the as yet-to-be-released Bison 1000 from Tethon3D that is described as having been designed specifically FOR CERAMIC and METAL printing.  Again, without having seen one, it's still a mystery as to how reliable one can get when printing ceramics in SLA or DLP.

But, the quest goes on with the realization that I have a LOT of teaching to do in spite of the fact that my only student studying ceramic printing with an SLA (me) at the moment is having a rough time grasping the fundamentals.  We'll keep you posted.

UPDATE: 

Formlabs has not certified their ceramic material for the Form 3 as yet and the plans for doing so are unclear.  This means that it remains an experimental material for the foreseeable future.  Even so, until another option is available, we will continue to pursue our own experiments in hopes of raising the percentages of successful prints to an acceptable, if not perfect, level.  Ceramics, for us, is worth the effort.

Ceramic Printer Video: Realistic Expectations and the Rewards of Tenacity

These pages are dedicated to introducing ceramic 3D printing to creative people at all skill levels and from differing backgrounds.  So, whe...