These pages are dedicated to introducing ceramic 3D printing to creative people at all skill levels and from differing backgrounds. So, when I find a YouTube video that I believe to be helpful, I want to include it and comment on my observations.
First, let me say I find the vast majority of reviews for new products to be utterly useless. Generally, the reviewer opens the box, tries the product, makes a video giving their reactions and then sets the product aside never to return to it. The video I am including in this post, byNathan Builds Robots is a refreshing departure from that formula!
Realistic First Time Expectations
Clay is not plastic.
Nathan could have edited out all of his startup hurdles. But, that would have deprived us of the reality of using a new 3D printer that uses an entirely new material. I really appreciated that Nathan walks us through each step including those that resulted in the kinds of failures that we need to overcome to be successful. Not only did Nathan learn from those bumps in the road, we learned, with him, how to put them behind us.
I came away believing that I just witnessed what I can realistically expect from my own first time experience with a ceramic 3D printer. This, alone, is enormously valuable. But, how Nathan proceeds through his learning curve is even MORE valuable.
Rewards of Tenacity
We constantly use 3D design and printing to emphasize the life lesson "Your Failures Are Not Final". You can bet we will show this video to our students because it show how we can turn failures into success by using critical thinking skills to come up with new solutions to try. We also use 3D design and printing to help students build "Resiliency" skills.
Nathan's tenacity is a great example of resiliency in action.
As we watch Nathan evaluate each printing attempt, we see him using the critical thinking skills that can turn that failure into developing a strategy to overcome that hurdle. Nathan wasn't content to print once and quit. He recorded repeated attempts over several days and every day brought about better and better results.
While he acknowledges that he has more to learn about the ceramic printing process, I look forward to future videos from Nathan as he continues to refine the ceramic 3D printing process.
Multi-machine Applicability
Another thing I appreciate about Nathan's video is that what he is experiencing and learning will have broad applicability across all of the new desktop ceramic 3D printers. The quest to find the right clay viscosity, flow pressure along with cleaning and firing tips will be useful to ALL of us, no matter which printer we end up purchasing. So, I, for one, have subscribed to his channel. I can't wait to see more.
The is no point in continuing to consider ceramic 3D printing if our life, or organizational, situation cannot implement every aspect of the workflow required to successfully integrate ceramics 3D printing into our goals.
This is probably not a complete description of the final workflow demanded of a user of a ceramic 3D printer. But, it will give us a good start at trying to determine how well we might be able to fulfill the basic requirements.
3D Design for Ceramics
Clay Selection & Procurement
Clay Preparation
3D Printing Process
Cleanup
Post-Printing Processing
Firing
Marketing (if applicable)
Anticipate Scalability
Obviously, this is a simplistic list of the elements of the workflow. But, it is a good start for taking a realistic look at our ability to truly implement ceramic 3D printing into our 3D printing goals for those we serve.
Workflow Requirement #1: 3D Design for Ceramics
Even the most talented traditional clay artist would fail to benefit from 3D printing if they could not find a way to create the virtual files from which to print. Fortunately, for us, we have found that our students enjoy using Moments of Inspirationto print with our traditional 3D printers, so at a bare minimum, we are confident that we can successfully meet the needs of this requirement.
But, it gets better than that. Quoting from the Eazao Blog:
"The major upgrade of the Eazao 3D printer this time is the software part. We cooperated with the Shandong University IRC Laboratory
to develop a series of software specifically for ceramic 3D printing,
which will greatly enhance the experience of Eazao 3D printers and lower
the entry barrier.
The software will be released for free in the near future. The
software is in the stage of intensive improvement. We integrate modeling
and slicing together to achieve a seamless connection between design
and manufacturing. It is currently divided into the following four
sections: sweeping modeling, lofting modeling, rotation modeling, and
texture mapping. At the same time, we also developed an interactive
modeling tool based on leapmotion."
The development version of this software is available for free download atClayontec.com. I have downloaded the software and, while it is not yet complete, I am convinced that ANYONE will be able to use this software to design almost unlimited designs suitable for meeting this requirement. It's remarkable software that produces very complex designs with very simple controls.Equally importantly, it can even be used to add material qualities to designs our students have created in MOI3D or any other CAD/3D Design program.
In the past, the question about whether or not an individual might have the skills to design clay vessels for a 3D printing was probably the biggest barrier to adoption of 3D ceramic printing. But, thankfully, Clayon goes a LONG way to make this particular question almost moot.
Not every clay will work well in a 3D printer. Before buying the printer it is important that we ensure we have the information we need to select the proper clay for our 3D printing needs.We are fortunate that Manassas Clay is nearby and we enjoyed working with them when we explored powder-binder ceramic printing.
For those not having a great resource like this locally, the good news is that ceramics 3D printing is not a new technology, even if consumer desktop ceramic 3D printing is new. There are many articles by skilled 3D ceramic printer users that clearly spell out the kinds of clay appropriate for 3D printers. We will cover this topic extensively in the future.
This is one of the most serious questions we need to ask ourselves before fully committing to incorporate ceramics into our 3D printing environment. The first step is to admit the challenges. The next step is to ensure we have come up with effect ways to meet those challenges.
There are videos and articles that can help us understand the clay preparation process. So, that does not concern us.
The real issue has to do with effects of introducing clay, itself, into our environment. Let's face it. Clay can be messy.
Part of our responsibility is to ensure that we have planned the processes to minimize negative aspects of using clay. This includes identifying equipment to keep the area clean and safe. We're ahead of the game in this regard because we already had to deal with the impact of using fine clay powders, which are far more potentially harmful than working with moist clay. We found many ways to use our regular 3D printers to create tools to help us keep our space as clean as possible.
Notice that I emphasized the word "fully" above. Some of our mitigation strategies might require obtaining a single printer for testing before we can fully understand what it will take to introduce it as an essential element of our program.
Workflow Requirement #3: 3D Printing Process
What is required for feeling confident with this step is going to be quite different from person to person.
We know that printing with ceramics, while similar to that of printing with plastic will have its own unique requirements. But, we not only have FDM printing experience; but, powder-binder and SLA technologies as well. Each of these have their own challenges and learning curves. But, we have always treated our learning space as a LAB. For this reason, we're confident that not only can we learn to use the ceramic 3D printer; but, thrive with using it.
For those with NO 3D printing experience, the Clayon software, mentioned earlier, combines both design and preparation of the files used by the printer. It even has a special functionality where it will test a design and report the likelihood of printing success.
Clayon Evaluation Report
This makes it significantly more likely that even a novice can find success with their desktop 3D printer. I might also add, that I have found that Eazao's support team has responded to all of my questions in a timely manner. Help is also available on their Facebook group.
Support has to be factored into determining if one can be successful with this aspect of using a desktop 3D ceramic printer.
Workflow Requirement #4: Printer Cleanup
One of the major differences between traditional 3D printers and a ceramic 3D printer is the absolute necessity of disassembling and cleaning parts as necessary to remove the potential negative affects of clay hardening. "Due Diligence" demands we consider this aspect of using s ceramic 3D printer in our environment.
TIME is one of the factors we need to address. Who will be expected to perform the cleaning is another.Actually, in a educational setting, they are related. The class period for a person starting a print may end before the print is completed.We will need to come up with workable policies before 'fully' integrating ceramics 3D printing.
Even in a home setting, it would be wise to ensure that just as much importance is placed on cleaning the printer as using it.
Workflow Requirement #5: Post-Printing Processing
When we finish a print with a traditional 3D printer we can usually get by with no significant post-processing. But, every printing attempt with ceramics will require some form of post-processing. This is true even of failed prints where it should be handled in a way that allows it to be recycled.
Without going into detail, post-processing involves a series of steps leading to final firing. These include, drying, low-firing, decorating and hand shaping. It's the place where the magic happens that can fulfill the need for hands-on creating that traditional clay artists cherish.
For us, it is also a place where those who face challenges in using 3D design software can be included in the creative process. Planning for this step in the workflow is a critical part of the "Due Diligence" required to get the most out of the ceramic 3D printing experience for participants of our program.
Workflow Requirement #6: Firing
We face a significant hurdle here.
There are reasons why a traditional clay kiln my not be permitted on our site.For others, the challenge may be the cost of a traditional kiln.
Fortunately, I have a kiln, at home, large enough to fulfill the requirements of firing in batches as we get started. And, the printed objects using a desktop ceramic printer can be dried enough to survive travel. (That was NOT the case of powder-binder prints!) But, to ensure continuity we will need to make long-term arrangements with an outside provider of kiln services.
While it limits the sizes of the objects our students might produce there is another option provided by Eazao and others.
That is a Microwave Kiln. The viability of using a Microwave Kiln can be tested independently, even before buying a desktop 3D printer.
Microwave Kiln
For home users, in particular, a Microwave Kiln allows them to get started with ceramic 3D printing without having to make a large investment in a traditional kiln.
For some, whether or not there is a market for what they produce is irrelevant. But, for us, it is an important consideration.
If there is potential that some of the at-risk individuals in our program may be able to develop their ceramic design and printing skills to the point of being self sufficient then we would be remiss in not providing training for them if at all possible.
The bad news about the parts produced by consumer 3D printers is that they lack perceived value. Parts produced on industrial quality printers are usually limited to the industrial marketplace and those markets are narrow and specialized. It is hard to learn those markets.
Ceramic 3D prints have a much higher perceived value by many orders of magnitude.
The possibility that one can discover a market for 3D printed ceramic parts they design has real potential. So, from the potential alone, ceramic 3D printing deserves serious consideration. But, marketing success does not just happen. It will take as much 'due diligence' effort as any of the other aspects when evaluating whether or not ceramics 3D printing can meet the ultimate goals and aspirations of our program.
Workflow Requirement #8: Anticipate Scalability
Our initial consideration concerns a small desktop ceramic 3D printer. This is perfect for exploring the potential of 3D printing in ceramic materials. But, ultimately we need to fully consider the scalability options should we need to expand. This is more than just thinking about bigger printers. It also has to do with the scalability of the skills learned while working with an entry level ceramic printer. The include design skills that might be expanded and hands-on skills related to the workflow involved with the entire clay creation process. Do the peripheral skills gained by working with ceramics enhance the future opportunities for users. For instance, our organization also has a home building vocational initiative. How might working at the entry level in 3D ceramic design relate to the future of 3D home building technologies?
Adding scalability to the evaluation might end up adding some elements to the workflow, like airbrushing, creating multi-object installations or incorporating into home building. So, it is important to begin with scalability in mind.
SUMMARY
Whether it be an individual or an organization, successful implementation of Ceramic 3D printing depends on being willing to ask serious questions that take into account the entirety of the ceramic workflow. Fortunately, Eazao has made some significant moves beyond simply creating and building a piece of hardware. Those moves, like the creation of Clayon, go a long way to make positive answers to the questions possible for the widest community of potential users.
Whether we are looking for a personal printer or one that will be used in an educational/vocational setting, due diligence requires that we survey as many options that may serve our needs as we can find.
Before learning about the Eazao Zero, I had known about other extrusion ceramic printers. What drew my attention to the new Eazao was the compact size and simplicity. So, my search for alternatives is filtered by those primary considerations. It would be a LOT easier had I NOT been able to find another comparable ceramic printer. But that was not the case.
The Tronxy Moore 3D ceramics printer is built on a similar form factor as the Eazao Zero. It uses a similar two-part clay delivery system with an external 'putter' pushing clay through a tube to the print head. In fact, at first glance it almost appears that the Moore 1 and the Eazao Zero might have come off the same assembly line. But, on close examination that is likely NOT the case.
Here are the images, side by side.
Tronxy Moore 1 / Eazao Zero
While I do not have either printer for hands-on examination. Watching the videos and web pages for each indicates that, in reality, there are some significant differences. The first, of course, is the orientation of the towers and build sizes. The Moore 1's tower is on the left and the Eazao Zero tower is on the right. The dimensions and build areas are also different.
Printer Size
Build Area
Eazao Zero
350x300x500mm
150x150x240mm
Tronxy Moore 1
355x252x370mm
180x180x180mm
Other differences are a bit more difficult to identify through images and videos. But, it appears the bearings and tracks that guide movement are of different types. There are differences in the motor end of the putters. In addition, the Eazao appears to have a full-size SD slot in the front while the Tronxy's Mini-SD slot is on the side.
Each of the differences between these two units has the potential to affect the user's experience. But, without having the luxury of being able to test them side-by-side, we can only make educated guesses as to what those differences mean.
I will also point out that the Tronxy Moore 1, at the time of this writing, can be purchased for about $300 LESS than the Eazao Zero. We cannot ignore a difference that large. But, we've learned that neither similar hardware nor purchase price are the only factors for great user experiences.
NON-HARDWARE COMPARISONS
I have poured over every video and/or document I can find from either company related to ceramic 3D printing. It is clear that Eazao, has just as much interest in supporting users with design and workflow applications as it does in making reliable hardware.Moreover, the software documentation from Eazao is much more clear than we've come to expect from 3D printer manufacturers. They seem to have excellent translators. And, so far, responses to questions to Eazao have been prompt and appropriate.
I have not had enough time to be fair to Tronxy concerning their commitment to users for the entire ceramic workflow. None of the Moore 1 videos I have discovered so far have revealed much more than the features of their 3D ceramic printer. But, a manufacturer having a commitment to the user's success through the entire workflow is something we feel that is very important to our decision making process.
PRELIMINARY THOUGHTS
Both manufacturers are using better than average XYZ rail strategies. I do have a bit more experience with the linear motion bearings with well-spaced rods under the print table that appear to be used by Eazao.But, the actual differences in table stability may be minimal.Clay handling appears to be similar; but, I still need to ask some questions about potential differences. (Eazao claims they have some patented parts in their putter.)I also have a personal preference for the full-size SD card slot being located on the front of the printer rather than a mini-SD.It makes life easier. Adapters to allow for the use of full size SD cards with printers having mini-SD slots are readily available.
But, at first glance, I think we could accomplish what we need to accomplish with either of these ceramic 3D printers.
What continues to be give a slight edge toward the Eazao Zero is their team's long experience with printing in clay and the fact that they are demonstrating that they realize a user's success goes well beyond hardware.3D printing in ceramics is a much different experience than printing in
plastic. So, experience building standard FDM printers may not guarantee a
full understanding of the ceramics workflow when it comes to answering
owner's questions. But, admittedly this is only an assumption.
It is clear that Eazao understands how to support users through the entire workflow process. More importantly, it appears they actually WANT to!
THIS BLOG RELATIVE TO THESE DESKTOP OPTIONS
The fact that we have identified TWO desktop ceramic 3D printers is good news. Our goal is to expand the use of 3D printing of ceramics in home studios and education. I am committed to doing what I can to help others wanting to create ceramic work via desktop 3D printing have the best experience possible. Most of the research we will do and publish will apply to ANY and ALL desktop ceramic 3D printers. I love 3D and I love the creative spirit I see in ceramic artists.
Due Diligence is important in educational and social enterprise settings. The next few posts explore some of the factors when considering 3D printing of ceramics in our situation.
3D Print Ceramics with the Eazao Zero
I am at the point in my life where most of the decisions involving pursuing a particular technology are based on how it might positively impact the life of at-risk students and, in particular, those on the autism spectrum. While there is an element of fun in all these pursuits involving 3D technologies, moving in any new direction has to be done while keeping a very serious goal in mind.
So, decisions cannot be made on a whim. We must do some serious "Due Diligence" and laboratory evaluations before adopting a new technology for introduction to those we serve. We've long considered ceramic 3D printing to be a worthy technology to explore because items printed in ceramics have an inherently greater perceived value than objects printed in plastic and, thus, we recognize its career potential for neurodiverse individuals interested in 3D design and printing.
As far as previous explorations into potential ceramic 3D printing methodologies goes, much of it was based on in-house experience with both powder-binder and professional SLA printing. Here, for instance is a video showing students on the autism spectrum using a powder-binder printer to turn some 3D scanned historic objects into prints. It's a great example of students helping students.
Why The Interest in Eazao?
Neither powder-binder nor SLA ceramic 3D printing were found to suitable for meeting the goals we have projected for our program. But, finding the Eazao's line of 3D ceramic printers encourages us to look more deeply at this new potential. While there are many factors to consider we'll just point out two in this post and introduce others in subsequent posts.
Eazao Zero Ceramics Printer
Factor #1: Scalability
One of most immediately appealing things about Eazao, as a company, is that one can start with a modestly priced desktop Eazao Zero ceramic printer to learn the basics of all aspects of exploring ceramics 3D printing and marketing. This includes the necessary workflow from clay selection and preparation to actually having product to sell. Even if one only begins with the microwave kiln, they are able to gain experience in all the steps required to produce viable and valuable ceramic works.
Then if that stage of development is successful, they can leverage that experience and grow by moving on to the much larger Eazao Mega 5 without having to change manufacturers.
Eazao Mega 5 Ceramic 3D Printer
For others, their advancement might mean printing smaller rather than bigger. Their Eazao Zero one experience might put them in the front of the line in a university setting for using the Eazao Bio microfluidic 3D printer. Since 2013, the at-risk students with whom I have contact, have enjoyed field trips to the University of Maryland's Fischell Bioengineering lab to watch experiments in growing living tissues aided by 3D printing. Their interest and the quality of their questions is astounding. So, I don't dismiss the possibility that one of our students might find themselves working in such a lab or even doing experiments on their own.
Eazao Bio Microfluidic 3D Printer
The breadth of the ceramic offerings from Eazao, offering scalability, is one of the reasons why they deserve consideration.
Factor #2: User Focus
Equipment manufacturers are notoriousfor having the attitude that just just making a well-working product is enough.It is not. That is particularly true for something like a ceramics 3D printer which crosses boundaries of experience.
Some of the potential users will have a typical clay artist background.They know hand working and finishing clay.But, they may not have even the tiniest experience with 3D printing.Other potential users may know 3D design and have used a traditional 3D printer.But, their experience with the workflow required to create a ceramics product may be sorely lacking. If there were ever a user base that needed help in bringing these two worlds together, it is the Eazao Zero 3D printer user.
So, we felt is imperative to try to divine the philosophy of Eazao's team regarding their relationship to the success of their users by searching articles, videos and social media posts.
The workflow for being able to successfully deliver a final 3D printed ceramic object is certainly more demanding than most 3D printing users face. Users of PLA filament don't have to prepare their own materials. They simply open a box and start using it. Traditional clay artists don't have to worry about things like leveling a print table, setting a gap and avoiding overhangs. There is something new to learn no matter from which camp an Eazao Zero user comes.
While the product is so new that Kickstarter contributers continue to receive them, there are already a fair number of videos from Eazao covering a variety of issues owners might face as the begin to set up their printers and begin trying to use them. This bodes well for the attitude we can expect from Eazao toward it user base.
While it's impossible to know for sure, based on their Kickstarter Page, the initial user base may be around 500 units. As the Kickstarter demand is fulfilled, is is only good 'due diligence' practice to keep a sharp eye out for how Eazao responds to inevitable issues* and user confusion.
So far, it appears to be much higher than most of the support for a new product I've seen over the last few decades. And that is good news.
* All manufactured products have some initial issues. It's unfair not to expect them. It's how those issues are addressed that makes the critical difference.
If one takes the time to look through all of the posts in this blog, I have explored several different technologies promising to enable the at-risk young at-risk people with whom I work to 3D print in ceramics with the ultimate goal of being able to support themselves.
Sadly, thus far, none of the technologies we studied has brought us closer to that goal.
All this time, and in truth, since the time I obtained my very first 3D printer, there has existed another type of ceramic printer that has been conspicuously missing from this blog. And, that is clay extrusion.
Why I have avoided Clay Extrusion in the Past
Before going further, I need to explain why a person professing an interest in 3D ceramic printing would avoid THE most common methodology of printing ceramics in 3D. The answer lies not in the technology itself; but, the target audience I hope to reach.
The early kits, based on modifying existing 3D printers, required a commitment to tinkering and a level of technological skill that didn't suit the user I have in mind. The next generation of dedicated ceramic printers tended to be large, complex and costly enough that only experienced ceramic artists or universities could afford. Again, those that I hope to help have more limited means and space. Until now, I didn't see a fit between those I want to help and the existing extrusion ceramic printers.
The Parallel in my Search for a Standard FDM 3D Printer
I started blogging about 3D printing in 2007. But, until 2012 my articles were only exploratory. The 3D printers before 2012 were largely aimed at tinkerers and hobbyists. It wasn't until 3D Systems announced the first 3D printer specifically aimed at consumers that I found a printer that I thought matched the audience in whom I was interested. It was compact, simple to operate and required no construction on the part of the owner.
I dove deeply into helping Cube users get the most out of their investment with the CubifyFans Blog.
In the first 5 months (beginning in January 2012) of my blog I could only write articles preparing potential users for its public release. It wasn't until May of 2012 that the Cube 1st Generation was released.
1st Generation Cube 3D Printer
From that time until the present, I was able to effectively serve an active community of users of 3 generations of Cube 3D printers by finding ways to get around issues and providing free tricks and designs of tools that enhanced their experience. While most Cube owners have gone on to purchase newer and more advanced 3D printers, the Cube was an excellent introduction to a lot of people to the benefits of 3D printing and the blog continues to have followers. And it was able to do so by reaching a consumer base rather than a technical or tinkerer base.
From that time forward I have watched the consumer market for 3D printers blossom and mature. So, how does this relate to ceramics 3D printing?
Recently, I learned about a small 3D ceramic printer that may be the parallel answer for ceramic 3D printing that I have been searching for the last two decades. I can't be absolutely sure, since the first units are just being delivered to Kickstarter supporters. But, it does look promising. Here is why I think that.
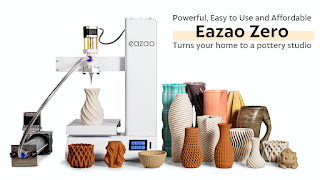
EAZAO ZERO CERAMIC 3D PRINTER - COMPACT AND SIMPLE
The first thing that jumped out at me was the compact size of the Eazao Zero. The basic construction of the 3D printer platform is a tried and true form factor familiar to many first time consumer 3D printer users.
Eazao Zero Ceramic 3D Printer
The small footprint perfectly fits the needs of those with limited space and fits well in an educational classroom environment. The 1.4mm nozzle diameter size and 0.4 -1mm layer depth was a very pleasant surprise. Lest some might consider the 150 x 150 x 240 mm build area limited, I
have to say it is one of the things that appeals to me most! I can
easily visualize a lot of beautiful ceramic objects that could be
printed in that 5.9" x 5.9" x 9.4" envelope.
EAZAO ZERO CERAMIC 3D PRINTER - HISTORY
The Eazao Zero is the 2nd generation ceramic 3D printer fromCerambot, a company that released its first ceramic delta printers in 2019 through a Kickstarter campaign. They know ceramic extrusion printing. The fact that, in spite of the current supply chain challenges, the Eazao is in the hands of some supporters is a great sign.
Cerambot Team
EASAO ZERO CERAMIC 3D PRINTER - COMMUNITY FRIENDLY
The price point of is well below the $3K cost of previously released ceramic printers. Based on the success of their Kickstarter campaign, with approximately 500 units funded, provides a solid foundation for building a community of users that can be a great source of help to each other. Unlike those relying on DIY built printers, every one of these users will be sharing experiences with the same equipment platform. This has tremendous benefits as my CubifyFans experience can attest. What works for one user is likely to work for all users when it comes to clay preparation and slicer settings. That fact, alone, is worthy of calling the Eazao Zero a real game changer.
EASAO ZERO CERAMIC 3D PRINTER - THE BREAKTROUGH PRODUCT?
A breakthrough product is one that so significantly addresses the needs of an under served market that it virtually launches that product category to new levels of acceptance.The Spreadsheet did that for computers. MP4 compression did that for videorecording. for more than 20 years, I have mourned the fact that the benefits of 3D printing has failed to reach the market penetration that it deserves in the ceramics community.
I think the Eazao team just might have found the right combination of compactness, ease of use, simplicity and uniformity of operation that has the potential to introduce 3D printing to a vastly larger community of users.
I look forward to following their progress. Nice job!
Last week we conducted our twice a year training for the Youth ChalleNGe teachers. They got an extra treat this time.
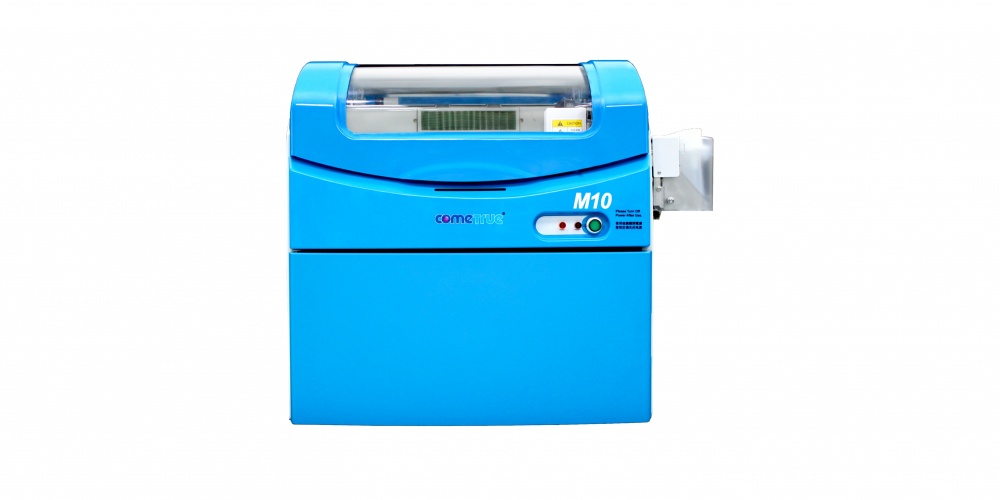
Rafal Pruszynski, the Sales Manager for Super 3D Plus Inc of Calgary, Canada was in our area visiting several prospective buyers and stopped by to show us some sample parts created on the ComeTrue T10 and M10 powder/binder printers.
We have been using full-color powder/binder printing for some time using our ZCorp Z450 and ah\\have been experimenting with ceramics for a while using a ZCorp 310. So, it was interesting to compare what we have been able to produce on our older printers with the output of the new ComeTrue printers. It was also interesting to compare cost of operation between the old and new systems.
COMETRUE SAMPLE PARTS
So, let's take a look at some of the images we captured and discuss what they mean for us.
ComeTrue 3D Prints Gypsum and Ceramic Prints
The ComeTrue T10 can print in full-color, which does not need to be fired, or ceramic materials that need to be fired in a kiln. The above collection contains samples of each. The statue in the middle, was not fired. It's simply a gypsum print. However, it looked carved due to the detail of the print.
The Sponge Bob like house was ceramic and colored during the firing phase. The Owl, tiles and vase in the top left were also ceramic. OUR COMPARISON GROUP
In this next group, we will add some of OUR prints for making the comparison.
Powder/Binder Prints including Z450
The first thing to notice is that the Z450's colors are faded and, because it relies on a older HP cartridges to supply the color there is visible banding. The bust with the plaid shirt and the buildings were printed on our Z450. The other thing that stands out in the caparison is that our old printer is just CMY. There is no true black because the black cartridge is emptied to permit it to dispense the binder. So, we can never achieve true black.
COMPARING COMETRUE PARTS WITH Z450 PARTS
This next two images demonstrate the differences in stark contrast.
ComeTrue Print (Left) vs. Z450 Print (Right)
Z450 Print(Left) vs. ComeTrue Print (Right)
While it has been great to have the Z450 to print in color, it is also clear that the ComeTrue T10 is infinitely better in terms of color, contrast and resolution. The ComeTrue 3D printer output is amazing!
COMETRUE PRINTS OF FULL BODY SCANS
But, I have one more sample to show you. I wish I had copies of these next images in full resolution so the detail could be examined at full size. But, the copies of the images I have appear to have been reduced to ease sending via email. Even so, I think you will be VERY impressed. No, that is NOT an image of a man. It is an image of a full-color print of a SCAN of a man! It's AMAZING!!!
Full color print of a scan printed on the ComeTrue T10
Needless to say, the teachers and our team a YouthQuest Foundation were very happy that Rafal was able to make it east and include us in his itinerary. The sample prints speak for themselves. I am including Rafal's contact information just in case you are interested in powder/binder printing. It is my favorite 3D printing technology and I have a new favorite powder/binder printer.
Rafal PruszynskiSales Manager Super 3D Plus Inc / 4G Vision Tech Ltd 1-(403) 452 2200 (office) 1-(403) 880 4 sales@super3dplus.com #140 3553 31 ST NW Calgary AB Canada T2L 2K7
Lastly, something most people may not think about.... open source materials and reliability. While we can use use 3rd party powders and binders in our ZCorp 310, that is not so with the Z450 or, as far as I know, of any of the present offerings from 3D Systems. Moreover, we could not keep our Z450 printer running very long without paying $6,000+ for an annual maintenance contract.
But, I am told most of the parts of the ComeTrue T10 are user serviceable and readily available. That is a HUGE consideration. And, I do mean HUGE!
I was going to move on to powder handling for my second "Due Diligence"; but, I got waylaid by my growing appreciation for the documentation available to us that provides a wealth of information as we do our research into the T10 and/or M10.
A good place to start is with a document I was late to find. And, that is a PDF that compares the T10 and M10 side-by-side.
Yes, you will find some spelling errors and typos in ComeTrue3D's English language documentation and web pages. But, don't let that fool you. There is a wealth of information that transcends ANY such minor flaws. Here are some things I learned from this one document.
Lines 1 through 4
Let's begin with the first four lines of the comparison table:
Model
T10
T10
M10
Application
Full-Color
Ceramic
Ceramic
Build Size
200x160x150(mm)
200x160x150(mm)
200x160x150(mm)
Max part size
190x150x140(mm)
100x100x60(mm)
100x100x60(mm)
We glean three interesting facts from these first four lines...
1. The T10 CAN Print in both Gypsum and Ceramic
The M10 is a less expensive version of the ComeTrue3D powder/binder printer that eliminates the full color capabilities to save money. But, it is not the only version that can handle ceramic powder. This is clear from the very first lines of the comparison sheet.
2. Color is Not Available with Ceramic Powder
Notice that the application doesn't split the two capabilities between Gypsum and Ceramic. It differentiates between Full-Color and Ceramic. I am trying to find out why. The aborted 3D Systems CeraJet ceramic printer could print in color using ceramic powder. So, I'm wondering if this might have something to do with 3D Systems patents, which would be aggressively defended.
Or, it could be an ink formulation issue where the current inks simply can't stand up to the heat. While it's an interesting question it is not a huge deal to us since NONE of the new ceramic printers can print in full color.
3. Build Size the Same but Part Size Differs by Application
Interestingly, when printing in ceramic powder, the allowable part size is reduced considerably. Nothing in the documents I've reviewed so far indicate the reason for this. It's certainly a factor in making a decision. True, it is very easy to use glaze to bond multiple parts during firing. But, even so it's hard to give the ComeTrue3D printers a 10 out of 10 when it comes to allowable part size when printing with ceramic powder.
Lines 5 through 10
In lines 5 through 10 of the comparison sheet we learn the following:
1. Type is "Desktop"
All of the models are classed as "Desktop" and are the same physical size.
2. Print Speed is 20mm per Hour
The great thing about powder/binder printers is that height is time. Unlike FDM printers, the difference in time between printing one item or 15 items is negligible. With a print speed of 20mm per hour, if the maximum Z-Axis is 60mm, then the longest print job would be about 3 hours plus the time to initialize a print job.
3. Layer Thickness Defaults 0.08mm, but, is Variable
Z-Axis Layer thickness is as little as 0.08mm. However, the listing for the M10 includes special modes specifically designed for developers wishing to use experimental powders. However, based on my earlier conversation with actual users, I'm thinking that this capability extends to the T10 as well. This would be a good question to ask your sales rep if you plan to use either of these printers in an experimental lab.
Lines 11 through 14
1. The M10 Permits "Print Time" and "Nozzle Slot" Selection for Developers.
Actually, this is talking about the number of times the printer applies binder for each layer. This is specifically provided to address the fact that "green" ceramic prints are more delicate than full color gypsum prints. ALL of the colors in the T10 are listed as "BINDERS". So, one can assume that full-color prints are sprayed with a bit more total binder in each pass than is a ceramic print. My understanding is that, being able to tell the printer to make multiple binder passes for each layer ensures that more binder is delivered and, theoretically, the 'green' part is a bit more robust.
The slot number selection may have to do with using experimental binders.
2. Horizontal Resolution is 1200 x 556 dpi
This is true of both the T10 and the M10 and is the same for both full color and ceramic. This is excellent resolution. But, remember, the true smoothness of a part surface is going to be determined by the powder used. Parts printed in fine powder will be able to benefit by this resolution better than those printed with a coarse powder.
3. The T10 uses TWO Print Heads and the M10 only uses ONE.
Both print heads on the T10 share the duties of dispensing color and binder. Since, the M10 is not a color printer, there is no need for a second head. Each head has 2400 nozzles for a total of 4800 nozzles on the T10. The print heads are MUCH larger than those on our ZCorp 450 or 310.
Lines 15 through 20
Most of the information in lines 15 through 20 demonstrate that the two different models are essentially the same in most categories of specifications. In summary both the T10 and M10:
Use the ComeTrue Print client software
Connect via USB 2.0
Are Certified for CE, FCC/IC
Operate in Windows 7 / Vista / 8 and 10
Operate at 100-210 or 200-240 volts
But, there is one significant difference in comparison line item 16.
The T10 Relies on .WRL Files for Printing Color
Both the T10 and the M10 can print from STL files. But, for color printing the only file type that it appears the comeTrue Print client can send to the T10 is the .WRL file type. Other common color file types like .OBJ, .PLY or .3DS must be converted to .WRL for printing.
This is not uncommon. The ZCorp Z450 requires "Vert color" .PLY or .WRL file types. But, it may be a new limitation to those not familiar with color printing. ComeTrue 3D has private labeled the "Pro" version of Netfabb as PixiRite Preparation Software. I understand that the cost is $1,500.
Since it is based on the NetFabb engine, it promises to be an excellent 3D file correction and converter software. While there is a "free" version of Netfabb available, it doesn't even come close to the power delivered by PixiRite.
Particularly if you are planning to capture 3D images for printing, I would urge you to seriously consider including PixiRite Preparation Software with your purchase.
We currently use Meshlab to make this type of file conversion. While free, it requires some complex workflow and we have not been entirely pleased with the conversions from .OBJ meshes to Vert color .WRL. Based on the little I've explore PixiRite, the whole conversion process looks cleaner and better. But, it is not something that I have been able to verify as yet.
Line 21
The final comparison in this document lists the consumables used by the T10 and the M10 in both full-color and ceramic print configurations.
Here is where it gets confusing...
Confusion #1 - Color Binders Under T10 Ceramic Column
I am not sure if this is simply an oversight or whether it's a hint that we can, in fact, use the color binders with ceramic. I have a call into the rep to clarify this.
Confusion #2 - Post Process Materials Included
In both the T10 and M10 ceramic columns, there are a number of materials that are NOT directly used with the printer itself. They are used only in the post-processing phase after printing is complete They are:
TP-81 (Ceramic Patch Powders) 200g)
TG-82N (Clear Glaze Powders) 500g
TG-82W (White Glaze Powders) 500g
All of these are powders that are mixed with water. TP-81 is used to fill cracks and holes that can happen when moving the part from the printer to the powder recovery booth. TG-82N and TG82W are powders meant to be mixed with water and applied as glazes in the final firing, if desired.
What is unclear at this point is the role of using a thin "slip" for the second firing cycle that permeates the part as is common with other ceramic powder workflows.
One thing is clear as I continue on my "Due Diligence" journey attempting to learn all I can about the ComeTrue3D series of powder/binder printers. Having had previous experience with ZCorp powder/binder printers helps me appreciate the thoughtfulness of MicroJet Technology's engineers as they designed these two printers. While there is still a lot to discover before choosing a printer for our future needs, it is clear that the quality of the candidate products is MUCH higher than I first suspected.
Anyone looking to buy one of the new breed of powder/binder printers is looking for a workhorse to support a serious business or educational function. These are NOT printers meant for hobbyists. And, that even includes the Kwambio Ceramo Zero Max having the lowest introductory price of about $5,000. All of the others are going to cost between $20,000 to $40,000. These include the Kwambio Ceramo Two, the xyzPrinting PartPro350 xBC, the ComeTrue3D T10 and the ComeTrue3D M10.
The enemy of that goal is downtime. So, part of the "Due diligence" responsibility is to try, as much as possible, to estimate what the vendor has done, both in terms of design and support to mitigate downtime. This is a bit tough when few machines are in the field and reliability history is in short supply. But, because it is essential to come up with the best evaluation as possible whatever the situation, we are forced to simply do our best by looking at what IS available. It would be wonderful to be able to wait until there are hundreds of users in the United States; but, we don't have that luxury.
I have to be honest, when I first began looking at the ComeTrue3D line of powder/binder printers all I saw were short slick sales videos with little real information. But, once I was able to talk with some users who had such great things to say about the A10 printer, MicroJet Technology and the Canadian distributor, it was clear that doing whatever it took to dig deeper was going to be well worth the effort.
The first goal was to find any and all documents and videos that would provide a more full understanding of the printer itself. So far this amounts to:
2 Overview videos
5 User documents
5 Intro - 1st Steps Videos
14 User Update & Repair Videos
4 Advanced Maintenance Videos
3 Cost Estimator Spreadsheets
2 PixiRite Software and Tutorials
I have taken the time to view each and every one of the videos and browse each of the documents.
This post will be limited to simply providing a summary of thoughts arising from reviewing the videos and documents surrounding the inking system. In subsequent posts I will delve more deeply into what I believe EACH of the materials reveal about the product and the philosophy of the company behind it.
First, MicroJet Technologies seems to understand the true situation of potential users in the United States. They are located in Korea. Their distributor is in Calgary Canada. And, we are thousands of miles away. The more we can help ourselves when issues arise, the shorter our downtime. The evidence that MicroJet Technologies understands our justified concerns begins with some fundamental design decisions as evidenced in the videos so far released.
It starts with, potentially, the most vulnerable parts, those of the INKING SYSTEM.
We have an old ZCorp Z450 color powder/binder. The designers decided to rely on then easily available HP B/W and Color print cartridges for the basis of their inking system. The same is true for the ZCorp Z310 Plus that was just donated to YouthQuest Foundation. While the HP cartridges used in the Z450 are still available, the HP10 used by the Z310 has not been manufactured since 2016! They can be found on eBay; but, they are extremely old and at some point will NOT be easily replaced. The most frequent errors thrown by the Z450 are printer cartridge "POGO" errors requiring replacement before proceeding.
Microjet Technologies uses their own cartridges. This makes sense because they are a huge manufacturer and innovator of inkjet print heads. What's more, the cartridges are continuously filled by large bottles of ink! You don't replace a cartridge when the ink runs out. You simply replace the bottle of ink... the least expensive part.
Not only is this strategy far less expensive than using a small conventional ink jet printer cartridge, with the T10, it means that materials other than colored ink can be fed through the cartridge. One of the existing users is doing just that. They are experimenting with using multiple binder types at the same time. They can even color the secondary binder if they want. this kind of versatility is not only useful in research, it tells us the value of the design. It may seem like an oxymoron; but, it's a closed system (proprietary cartridges) that is also OPEN (user supplied inks & binders).
So, lets start with the ComeTrue T10 3D Printer Installation Video that illustrates our point.
There are a number of things to point out in this video that tell us a lot about the philosophy behind the design of the T10 and that carry over to the M10.
Loading Ink and Binder is Software Assisted
The client software that comes with the T10 or M10 has a Maintenance Tool Tab that positions the printer carriage to the correct place for both loading materials or cleaning the print heads.
Easily Accessible Liquid Consumables
All of the liquid consumables are located outside of the printer. And, the status of all of the liquid consumables can be ascertained well in advance of running out of one of them. While we would take the precaution of having at least one of each replacement on hand, it's still a good feeling that we would know well enough in advance we were getting low on something in time to order a replacement.
The liquids include inks (Cyan, Magenta, Yellow and Black), binder and cleaner.
It's also nice to know they are LOCKED into place!
The Liquid Feed System is Ingenious and Simple
The ink flows through tubes, having insertion pins, to the print heads . The clips that permit locking a tube are color coded and the print heads themselves are very easily inserted. The video cautions the user to make sure that both print heads are completely in place. That's easy enough.
Cleaner Dispenser is Built In to the System
We
appreciate the fact that the cleaning system is an integral part of the
design of this printer. While other videos show that we still have
some manual cleaning to do, it's nice to know thatat least the major cleaning functions can be handled from the client software itself.
The video demonstrates that the cleaning process is done when the cartridges are initially loaded and can be repeated later as needed.
Also, it should be noticed that the level of cleaning is user selectable.
Summary for Due diligence #1
The inking system of the ComeTrue T10 (and consequently the M10) is a HUGE improvement over the inking systems used in the ZCorp powder/binder printers we now own.
While the savings won't cover the costs of buying a ComeTrue, they should be significant. But, the real benefits should come from less down time from "POGO" errors involving the older HP print heads. And, ultimately, having the same manufacturer responsible for both the printer and the print heads should ensure that the situation where the print heads are discontinued for otherwise viable printers should never happen with the ComeTrue 3D printers.
The simplicity and versatility of the inking system is also a positive factor. The fact that one user is replacing a color for an extra binder tells me that the system is not preventing users from finding alternative materials. In fact, I am told this openness extends to the powder as well.
This not only is a big positive about the printer; but, says a lot about MicroJet's customer centered design philosophy.
Finally, our current color powder/binder printer is CMY, with the black cartridge being emptied and used for dispensing binder. Obviously, black features are rarely black. But, it also affects ALL the color tones. The CMYK system of the T10 promises to be a hugely significant improvement.
I give the inking system a 10 on a scale of 1 to 10.
UPDATE: After fighting to find good HP10 cartridges for 7 plus hours for the ZCorp 310, I am more convinced than ever that the newer printers, like the ComeTrue T10 and M10 HAVE to be a vast improvement. Finally got thr 310 to print; but, it was touch and go for a while.
This post is NOT going to be a review because I do NOT have a ComeTrue 3D Ceramic printer with which to conduct a review. It is simply a public disclosure of my private investigation into a possible candidate for us to purchase in our quest to print in ceramics.
Nothing should be read into this report because it is the first printer I am relaying any results of my research. It's simply the only new ceramics capable powder/binder printer under $50,000 with which I am aware that is actually in the hands of users.
So, far I have been able to talk with two persons having experience with the ComeTrue T10 full-color powder/binder printer and the North American distributer. While this is not a wide swath of people, we have to rely on where we are now and that is a small user base so far. Neither had the M10 version; but, if anything, one might expect the A10 version would be more complex and prone to failure. At least that is my assumption. Again, we're going with what we have.
Both contacts were in university settings. One was in Texas and the other in Wisconsin. Here are my summary reports 1. Manufacturer's Background (MicroJet Technology)
The ComeTrue line of powder/binder printers is manufactured by MicroJet Technology located in Taiwan. They were established in 1996. While they produce a range of products, it appears that they are best known for their thermal bubble inkjet printheads, inkjet cartridges and "CurieJet" liquid micro pumps. With this in mind, it makes sense that they decided to tackle powder/binder printing since all of these elements are at the core of powder/binder print engines. That being said, one would be hard pressed to be able to intelligently evaluate the ComeTrue printer based on any information found in the MicroJet Technology web site. Their dedicated site for the ComeTrue line of 3D printers, found at https://www.cometrue3d.com/en/ is a bit more helpful, it is still left up to the visitor to find out truly helpful information.
In short, in my mind, now that I know more, their web site does not truly reflect the value of their product and their commitment to a buyer. That simply means one has to dig a bit deeper to find the gems and I was motivated enough to do so.
2. North American Distributor (Super 3D Plus Inc)
The North American distributor is listed as "Super 3D Plus, Inc" in Calgary, Canada. But, when you click on the link, it takes you to http://www.calgary3dprinting.ca/. Confused? So was I. And, what was particularly confusing is that there wasn't a single reference to the ComeTrue 3D printer on the home page. It's only after you click on the "3D Printers and Scanners" link, that takes you to a page for a company called 4G Vision Tech, that you find the ComeTrue 3D printer among a host of other consumer printers and scanners.
I don't blame you if you think things are getting a wee bit sketchy here. And, if I told you that I called four times without actually reaching a person, I wouldn't blame you for thinking me very foolish to proceed.
The good news is that when a real person called me back, they sounded like they actually knew what they were doing and had some very good responses to my naturally leery questions. But, the best response was that not only have some ComeTrue 3D printers been delivered to customers in the United States; but, they would help put me in touch with them so that I could found out a real user's experience directly from the user. 3. Current Users are Serious Academic Research Facilities
I hope I can be forgiven for expecting the user referrals would take me to somebody working alone in a basement that nobody could validate. But, I was certainly wrong. I was given 3 names from two prominent technical universities using the printers for serious research. As I noted earlier, one was in Texas and the other in Wisconsin. I looked up all the referrals to confirm their credentials before contacting them. Very, very pleasantly surprised.
4. ALL Users Reported EXCELLENT Support
My first question, of course, was "Is it real?" Given that was answered in the affirmative, I then went on to ask about reliability and support issues. Every single user had nothing but great things about Rafal and Gary, their distributor contacts. Moreover, they were effusive about the support they got from the engineering team in Taiwan! This support even rose to the level of adding custom features into the client software to support the specialized materials with which they were experimenting.
5. THE perfect Research Platform
These users were going well outside the normal range of uses because they were using the ComeTrue to experiment not only with custom powders; but, unique binder combinations. If anything was going to stress the ComeTrue A10 it is the work these users are doing. In fact, one called the ComeTrue THE perfect experimental platform for high peformance ceramic research. That was because they could so easily swap out powder materials and use a mix of custom binders.
By the way, one is operating with powder MUCH finer than the stock material, which sounded very interesting.
6. Parts are Reasonable.
Because the supplier is in Taiwan and my own experience with powder/binder printing says things WILL eventually break it was important for me to find out the costs of expendables and replacement parts, like boards, that might bring our operation down. The printer was described as relatively uncomplicated with affordable parts that could be kept on hand in case of emergencies. Printheads, for instance, have a mean-time failure rate that is fairly constant. So, having a spare around is a good idea. Since the user relating this information also had ZCorp printers, they pointed out that the life xpectancy of the ComeTrue parts was better than the HP printheads used in the Zcorp printers. 7. Tentative Evaluation
Since none of the users actually owned an M10, it's impossible to reach a firm conclusion from a couple of phone calls and emails. But, I've not heard a single bad thing about the ComeTrue platform. In fact, they only thing remotely negative was simply to point out that the print area is more limited that the old ZCorp 3D printers. And, I already knew that. While a factor in making a final decision, it's just one of many considerations.
Quite frankly, I am VERY impressed by what actual academic researchers had to say and I not only have a very positive outlook about the team at the distributor; but, the commitment of the team in Taiwan to deliver a positive user experience to owners.
If you are in North American you can reach the distribution team through this contact page:
I have had the privilege of being able to experience many forms of 3D printing, from very low cost consumer FDM 3D printers to professional Multi-Jet 3D printers costing nearly a hundred thousand dollars. But, my favorite 3D printer type has always been powder/binder printing.
Perhaps first and foremost, you don't have to deal with vexing supports marring complex and beautiful finished parts. The powder is, itself, the support system and it is easily blown off the part at the end of the print. But, another reason is that it is a surprisingly clean and safe method of printing. In my mind it is MUCH safer and, ultimately, cleaner than liquid resin SLA.
Ceramic 3D printing, could be within reach of designers and artists, has been around for a while in the form of extrusion printers using a form of semi-liquefied clay. May clay artists have found this method of printing to work well for them. Extrusion clay printing has definitely been of value to others; But, it's never had an attraction for me. Maybe I know that I'm just too lazy to clean up the mess after the print is done.
Earlier posts have talked about my experience with ceramic resin using a Formlabs Form2. While we seem to be making progress with reliability, and it definitely has a place for small, intricate items like making ceramic jewelry. It still is NOT a method I would want to count on to build a 3D ceramic printing business due to the print times. It is not particularly well-suited for scalability.
I'm just going to say it. My bias is toward powder/binder, which is remarkable since I personally have not printed a single ceramic item on a powder/binder 3D printer. The problem up to this point is that unless one was willing to spend several hundred dollars there were no powder/binder printers dedicated specifically for ceramic powders. One had to modify a gypsum powder/binder printer and find a 3rd party to supply an appropriate ceramic powder and accompanying binder.
Ceramic Powder/Binder Printing to this Point in Time
Tethon (Tethon3D.com) is one such company. They provide several clay based powders to those who wanted to convert older ZCorp 310 printers to create ceramic 3D objects. At YouthQuest Foundation, we were just given a surplussed ZCorp Z310 Plus by the Fairfax County School System.
ZCorp Z310 Plus Powder/Binder Printer
Like our ZCorp Z450 printer, the 310 is designed to use a gypsum powder. But, unlike the Z450, it is monochrome. And, more importantly it does not rely on a cartridge binder supply system. Binder is poured into a container on the right side of the machine, allowing for the use of 3rd party binders. And, because the 310 is no longer supported by any manufacturer there is no risk of voiding a warranty because this is none. When we obtained it, there was no print cartridge installed. So, we have no idea if or when we might be able to get it up and running. But, if and when we do, we will test one or more of the ceramic powders available from Tethon3D.
The down side, even if it does work well, is that it uses an HP 10 printer cartridge and, while they are still available on eBay, they have not been manufactured since 2016! So, it is NOT a printer upon which we can rely too far into future. Sooner or later even if one could find an HP 10 cartridge, the chances of it working would be slim to none. But, for now, it is our best hope to begin our journey into printing in ceramics at the lowest possible cost and risk.
New Options: Kwambio & ComeTrue
A week or go, I would have written that there were only two new options for printing ceramics in 3D that was anything close to being a reality. And, those options came from the same company, Kwambio. The Ceramo Zero Max, at around $5,000, is the low-cost option and the Ceramo Two, at around $40,000, is the professional option. (Prices might vary when actually released) But, now I know that there are two viable companies making viable ceramic powder/binder printers. Let's first examine Kwambio.
Kwambio - Ceramo Zero Max, Ceramo Two
The primary printer I've been following for the past few months is by Kwambio.
We also have a sample part printed on a Kwambio ceramic printer.
It has a wonderful feel and finish. So, we know that it can produce beautiful ceramic prints. I wish I could tell you more; but, as far as I know, there is not a single Kwambio printer in the field as it has yet to ship. Do I believe it's real? Yes. But, until I visit the Kwambio offices in Hartford, CN, I am completely relying on the part I have in hand and the great communications I've had with Kwambio's sales and marketing teams.
Microjet- ComeTrue
For over a year, I have been following reports that two new powder/binder printers were reportedly being readied for market by Asian companies. One was by SkyTech and was called the 3DPandoras. So, far the 3DPandoras is what we used to call in the video game field, "Smoke & Mirrors". From what I can tell, so far, all they have managed to achieve is to make their kickstarter customers demand their money back. While that could change in the future, I'm not counting on the 3DPandoras any time soon.
Until a week or so ago, I would have told you that the ComeTrue ceramic printer was ALSO most likely smoke & mirrors. But, while reading about Tethon3D powders, I stumbled upon a reference that their powders also work in the ComeTrue M10 3D printer. Hmmm... how could they know unless there was an actual ComeTrue printer with which to test it. So, I made a concerted effort to see if, in fact, the ComeTrue printers had started shipping into the USA.
It took some effort; but, that effort paid off when I was actually able to talk with the North American distributer and quickly got some references for actual users.
ComeTrue M10 3D Powder/Binder Ceramic Printer
It should be noted that the users with which I've talked have the full-color A10 version. But, the reviews I'm getting so far, are largely positive and realistic. If they reported that a new powder/binder printer was absolute perfection, I would have dismissed them immediately. After all, we've lived with the Z450 for more than 5 years and pay a hefty price for support just to keep it running! But, what I have heard is that while there have been minor issues, the response by the support teams in both North America and abroad have been swift and helpful. That is wonderful news.
The ComeTrue M10 is their ceramic specific printer. I understand that the delivered price, with training and installation, comes in at around $20,000. So, it falls between the two Kwambio offerings in price. However, I have NOT seen a sample part. But, here is a video that might be helpful.
If and/or when I get my hands on an actual sample I will let you know.
NOT EITHER/OR
For our application to be successful, we need to be able to print at production levels. And, the most important factor is mitigating down time. All 3D printers fail. And, that is a given for a powder/binder printer. The issue is not a failure; but, how well you can avoid having that failure disrupt your business catastrophically. And, that probably means building in redundancy.
For an individual artist already creating ceramic works of art manually, a single $5,000 Kwambio Ceramo Zero Max is AUGMENTING your income. So, being down for a day or even a week isn't catastrophic. But, for others, sharing the down-time risk over 3 lower cost printers might be a better strategy than purchasing a single high cost printer.
If we are successful in the endeavor we have planned, which will provide employment and training for at-risk students on the autism-spectrum, our ultimate strategy might be to have several $5000 printers, a $20,000 printer and a $40,000 high-volume professional printer in order to provide the highest levels of performance and quality while mitigating the affects of temporary failure by sharing the load over several print platforms.
The point is that having multiple choices is terrific. As I learn more about each of these options I will be quick to share them with you.
With each print job, new things come to light that help us learn what it takes to reliably print with the experimental ceramic resin on the Formlabs Form 2.
With the first successful print completed, with just one earring. It was time to complete the pair and add a second pair to see how more than one earring printed. So, the second print job included three earrings. All of them were oriented as was the first.
Fortunately, the print was successful. So, at this point I have been able to print 2 pairs of sample earrings. This was encouraging!
FormLabs Ceramic Progress... four sets completed.
But, it was more than that. It gave me multiple items to study closely.
The first thing that became clear is that while it is doable, removing all these supports cleanly is going to take time and time is money. I had to find a way to print the items upright, or as near to upright as possible so that areas impacted by supports are minimized, while still providing the adherence required for successful printing.
One key, of course, is robust support creation. But, the other key, was not so obvious. But, it had been in front of me every time I had been successful up to the point of finishing a raft. That key is preventing "cupping". Think of "cupping" by visualizing the tentacles on an octopus or squid. Our designs can form the suction cup features that make it difficult to separate a newly printed layer from the bottom of the resin vat. In fact, the suction can be so great that it breaks supports completely causing catastrophic failure.
As I studied the successful prints carefully, something caught my eye. What you cannot see in this image is that there are little holes around the circumference of the rafts generated by the Formlabs software. They are SO tiny that it is even difficult to see them when you look closely while holding one in your hand. Yet, they are important clues. They are relief holes that allow air to escape which prevents cupping from happening at a level that causes the parts to fail.
I had been warned about "Cups" by the Formlabs software in previous prints. But, now that message took on new meaning and I decided to investigate more deeply. Before attempting to print again, I realized I had to create those same little escape holes in my entire part.
I have done so and now have just begun a new print job with four earrings. Each earring design includes internal venting tunnels. We'll see how it goes. We'll have to wait some hours to find out. But, I can tell you this, I am encouraged enough to purchase a new cartridge of ceramic material so that I can continue testing. There IS light at the end of the tunnel.
UPDATE 1:Support removal is unique for Ceramic Prints
I will write more about this topic in the near future. We've been dealing with supports for years with a wide variety of techniques. Using SLA plastic support removal tools and techniques is NOT going to have the same outcome with ceramic prints. Ceramic prints in their "green" state crumble easily. So, using snips without damaging a part is more difficult than when removing plastic supports. We're thinking that something like a rotary tool with a Dremel 561 Multipurpose Cutting Bit might be effective. We'll see. More later...
Dremel 561 Cutting Bit
UPDATE 2:"Tunnel" method works!
"Tunnel" Test Print
This was a quick snapshot taken with my camera just as the print completed. Raft and supports were part of the design. Raft is a hex design so that multiple groups can be easily placed into the print area.
But, I will have to delay getting better pictures for a bit due to our full teaching schedule through Saturday. This is 3D ThinkLink Immersion Lab week for 6 cadets from Maryland, DC and South Carolina. Keeping 6 cadets busy designing and printing on single color FDM, Color Mixing FDM, powder/binder full color and SLA takes full concentration. Besides, it is a LOT of fun!
BTW, the print that finished this afternoon just about emptied my first ceramic cartridge; but, more is on the way.
Even though it might not arrive this week, we'll let the cadets design something for ceramic to be printed and fired before their graduation ceremony where we can present it to them. In the meantime, we do have "tough" resin so they can see the result of their design from an SLA printer. They will be the first group to be introduced to both powder/binder and SLA during their 3D immersion experience.